Setting up the Flask server
Now that we can access our database from Python, we can start implementing the server side or ‘backend’ of our Web Stack. For this we will use the Flask library for Python. Flask is a basic web application framework which can set up a simple web server completely within Python. The advantage of using Flask for us is that it will automate most of the technical details of setting up a server, and minimize the amount of server-specific code we have to write. It also has the advantage of keeping the entire backend within a single Python script, including all server operations, reading from the database, and running any data analysis code including Machine Learning. This will allow us to focus on the fun part of writing code for processing the data, and designing the way that user interactions from the frontend will interface with data processes running on the backend.
[client <-> server <-> database]
So what exactly is a server? A through description of server architecture is definitely beyond the scope of the course, but for our purposes it is enough to think of the server as the middleman between the database, where the data is stored, and the frontend or ‘client’, where requests for data occur. Most of the time, the server sits idle, waiting for requests from one or more users. Users can connect to the server and ask for information in the form of structured ‘requests’. Once it receives a request, the server does whatever processing is necessary and then returns of ‘serves’ this information back to the user. In addition to simply getting the data through queries to the database (which we’ve already seen), the server can also process the data in various ways, including running more advanced analysis such as Machine Learning.
In a true Web-based setup, servers are usually located offsite, organized in large distributed and networked clusters, and housed within large warehouses called ‘Data Centers’. To see what this server infrastructure looks like in the real world, you can take a look inside one of Google’s Data Centers here: http://www.google.com/about/datacenters/inside/streetview/. The client side, on the other hand, is composed of all of the personal devices that people use to log on to the internet. When you go to a web browser and type in an address for a website or use a web-based service like Google Docs, your device actually connects to one or more of these servers, and sends a request for information. This type of infrastructure was originally developed for viewing content on the web, with servers being devoted to simply serving up static web pages based on user requests. However, this same infrastructure has been widely expanded in recent years to power all kinds of interactions, from web-based software such as Google Docs, to cloud storage services such as Dropbox.
Our Web Stack will be based on the same technology, only in a much smaller implementation. The database, server, and front end will run locally on the same computer, while in the real world they would be happening on various machines in different parts of the world, both within Data Centers and in people’s homes. However, you should know that the technology we will be using is exactly the same, and with some effort and investment could be expanded to function just like any other web-based service. Thus, the code we develop will implement many of the same platforms and communication strategies that power Cloud-based solutions today, only at a reduced scale which will be more secure and manageable within the scope of the class.
Flask provides a very thorough documentation of all of its features, however it might be overwhelming for beginners looking for a place to start. These tutorials will go step by step and cover any server code that you need for the purposes of this class. If you want to go one level deeper and get a bit more higher level information on Flask’s features you can start with the Quick Start page, which highlights the most important aspects of the Flask framework. Much of the initial server design for the Web Stack was also based on a great tutorial by Abil Moujahid, which covers how to use a Flask server to drive a real-time web-based data visualization. Although he uses a different type of database (MongoDB), and the front end visualization is completely different, it is still worth a look if you want to get more background or a different perspective on the basic strategy.
Setting up Flask
Like pyorient, Flask is an external Python library, so before we start to use it we need to install it into our Python distribution. Unlike pyorient, however, Flask is available directly from Canopy’s Package Manager, so go to the Package Manager (make sure you are logged in with your Academic account) and type in ‘flask’ to the search bar. Select the most basic version (should be just ‘flask’ followed by a version number) and click the ‘Install’ button to install it. Once the installation completes you can go to the Python interpreter and type in:
import flask
If you don’t get an error the installation was successful and we are ready to go. To start, fork and clone the ‘week-3’ repository from the DMC Github page. This repository will give you the most basic file structure that we need to set up a Flask server. The repository contains several files, including an ‘app.py’ Python file which will contain all the code for the server, and an ‘index.html’ file in a folder called ‘templates’ which has a bare minimum structure for the front end website. There is also a folder called /static with a /lib folder containing reference files that we will get to in the next two tutorials. Open up the ‘app.py’ file. This is an empty file where we’ll write the code for our basic server. Start by importing the two Classes we will need from the flask library:
from flask import Flask
from flask import render_template
Notice we are not importing the whole library but only the two Classes that we need from it. Importing only the Classes you need is a common strategy to simplify code and minimize overhead when working with large libraries. Next, create a variable to store an instance of the Flask class:
app = Flask(__name__)
Using this variable we can access the server and specify how the server should handle incoming requests. To start with, we will create one route, which will handle requests coming into the main path of the server. On a new line type:
@app.route("/")
def index():
    return render_template("index.html")
The first line uses a special decorator (signified by the ‘@’ sign) to establish a route for incoming messages to reach the server. The function you declare right after this decorator will execute every time a request is sent to this route, and whatever is returned from the function will be sent back to the user making the request. In this case we will make a simple function that just returns a basic webpage. To do this you return the render_template() function, with the name of the webpage (which should be in your templates folder) as the single argument.
Now let’s take a look at the webpage file that will be returned. Open the ‘index.html’ file that is in the /templates folder of the repository. The file should contain this text:
<html>
<head>
	<title>Flask Demo</title>
</head>
<body>
	<div>This is a page</div>
</body>
</html>
This is a super basic website, with just enough information for us to start testing our server. Websites are coded in a language called HTML, which is a markup language similar to XML, in which structures are defined within blocks, anchored by matching ‘tags’ on either side. The largest structure is the whole site, which is wrapped within a <html></html> tag. Within this there are two main blocks, the <head> which specifies some metadata about the site such as it’s name, and the <body> which contains all the code for the visual elements of the site. In this case the body contains only one line of text, which will be displayed on the site. This text is wrapped within a <div> tag, a general purpose structure which defines the formatting of a block of content. A full description of HTML web development and formatting is beyond the scope of this class, but we will develop as much code as we need to make our Web Stack function, and I will try to provide references along the way in case you want to dig deeper.
Now let’s go back to the ‘app.py’ file to finish off our server. Now that we have the main route, we need to write some code to actually start the server on a specific local path. Type the following two lines at the end of the file:
if __name__ == "__main__":
    app.run(host='0.0.0.0',port=5000,debug=True,threaded=True)
The conditional on the first line checks to make sure that the script is running on the main thread (as opposed to being imported by another process). Although this will not be an issue in our particular case, this check is a best practice that will prevent the server from being unintentionally launched in case someone references our code from within another process. Within this conditional is the code to launch the server. We use the app.run() function, and into it pass parameters to specify the address we want the server to run on, the port it should use, and some optional parameters about debugging and threading.
These two lines of code should always be at the end of your app.py file. If you define other functions or routes after this code they may not be recognized by the server, so when we start to add other features later in these tutorials make sure you add them before these lines, and that these lines remain at the very bottom of the app.py file.
The next step is to open up a command prompt and execute the ‘app.py’ file in the Python interpreter by typing ‘python app.py’ within the directory which contains the file. You can also open the app.py file in Canopy and execute it from there by hitting the green ‘run’ icon in the menu. This will start the server, and you should see this message:
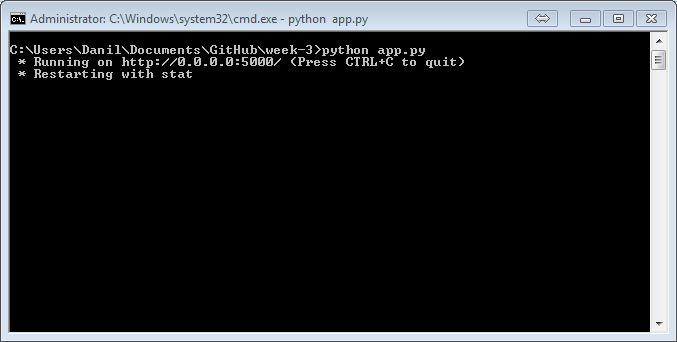
This tells you that the server is now running on the path http://0.0.0.0:5000/. You can access it by typing this address into a web browser, or use localhost:5000 as a shortcut. Do this now, and you should see a basic website with just the words “This is a page” on the screen. What is actually happening behind the scenes is that the web browser connects to the Flask server, and sends a request on the main path (‘/’). In response, the server runs the function under the main route, and returns our basic .html website. The web browser then displays that website back to us.
Once you run it, the app.py Python file will continue to run in the background until you stop it. While it is running you will be able to access the server through the browser. While you are working with the server you should keep the Command Prompt, Terminal, or Canopy instance that you used to execute the file open and running. If you wish to stop the server you can press ‘Ctrl+c’, which will terminate Python and stop the server. Note that if you make changes to the server code you might have to manually stop the server and restart it before you can see the changes take effect.
Although it seems very basic now, we can quickly extend this communication framework to create some pretty interesting functionalities in our Web Stack.