Getting Started with Github
In order to complete the assignments for this class, you will use Github, a distributed revision control tool that is extremely popular with software developers. Github is used by developers to manage code and other files related to projects, and to organize it in a way that makes it easy to develop projects within a team. With text and other human-readable files, Github can keep track of changes being made, allowing you to easily see which parts of the project are being developed, and to roll back changes if necessary. Github also provides several other features useful for software development, including different access control to different parts of the project, bug tracking, feature requests, task management, and wikis for every project. You can think of Github as Google Docs, in that it keeps track of changes in text documents and allows collaboration on documents between different team members. Unlike Google Docs, however, Github is much more structured, and uses explicit changes or ‘commits’ to keep track of the changes being made by each person on the team.
Github will allow us to keep track of our code as we develop the DMC Web Stack, and to streamline the process of turning in assignments. In the process, we will learn some of the standards of how code is developed in the real world. If you’ve never used it before, Github can seem a bit daunting and even somewhat counter-intuitive. Luckily, Github provides many resources for learning the system by following step-by-step tutorials. I recommend you at least go through the ‘Hello World’ tutorial before proceeding with the rest of this lab.
Note: Github is based on the Git version control system, which is used completely through the command line (by typing text commands rather than clicking buttons on a graphic user interface). However, Github also provides a standalone desktop client with a graphic user interface which can be easier to use for beginners. The client has all the features you will need to complete these labs, so you should not have to use the command line interface, but feel free to learn, explore, and use it if you are comfortable with it.
##Forking and Branching, Push and Pulling
To structure collaboration and keep track of document revisions, Github is based on a very specific workflow. Each project is contained within its own repository, which you can think of as a folder on your desktop. This repository exists on Github’s servers, but you can also clone the repository to your desktop, where it will live inside a specified folder (usually called Git or Github within your My Documents folder). The Github software will then take care of syncing your local folder to the contents of the repository.
Each repository can contain multiple branches or versions of the project. When you start a project, by default all of your changes will go on the master branch, which is the main version of your project. At any point you can start another branch, which will replicate all your files and allow you to make changes without affecting the master branch. In software development this is used to test out ideas or features in a safe way, while master maintains the latest stable working version of the code. At any point you can merge the contents of a branch with the master, and the Github interface will help you to look through the changes and handle any conflicts.
When you make a change to a document locally, Github will not automatically save the changes to the repository. To update the project with your changes, you need to push a commit to the repository. The commit tracks every change made to every document since the last commit, and provides a clear revision history of the project. At any point, you can step through the commits to undo any changes that have been made.
In addition to storing and tracking your own projects, Github provides several options for contributing to other people’s projects. By default, all code on Github is open-source, meaning everyone can see the code freely. However, you cannot make changes or ‘commit’ to it without being granted permission by the repository’s owners. Another way to contribute to a project is to fork the project, or create your own version of the repository under your own account. This fork will function just like the main repository, allowing you to make changes and push commits to it, but will exist separately. You are free to keep developing this fork on your own, and even spin it off as its own separate project. If at any point you want to contribute your changes to the main project, you can submit a pull request, which will alert the repository owners of any changes you have made, and give them the chance to either accept the pull request and merge in the code, or deny it and keep their code as it is. This fork/pull request workflow is quite common in open-source software development, where many people might be contributing to a project without a higher level organization structure.
##Testing the workflow
To get started, go to https://github.com/ and sign up for a free account:
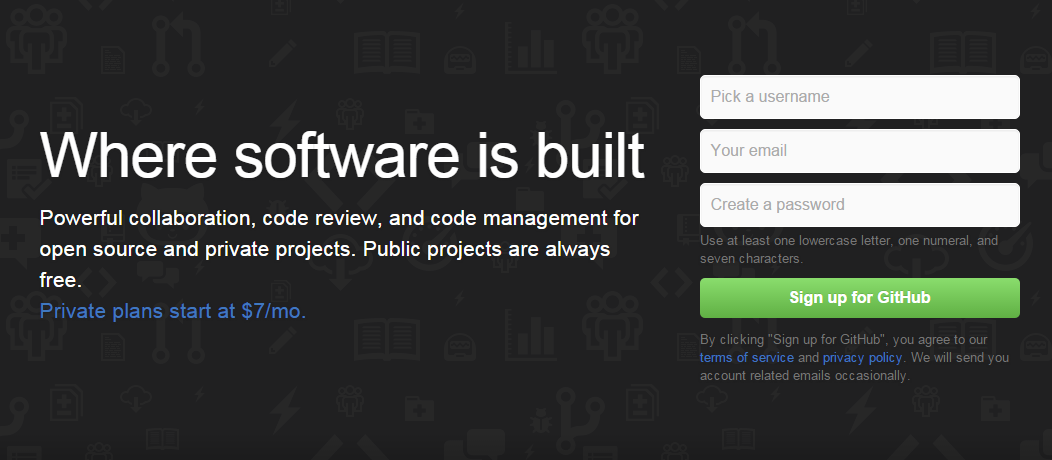
Then go to: https://github.com/data-mining-the-city/
This is the main page for all of the lab assignments for the class. Here you will find a separate repository for each week’s assignment, which will include the starting code for that week. The process for completing and turning in assignments is:
- Each week, fork the repository for that week into your own account. You can fork all the repositories at once, or do it before starting each week’s labs. Be aware that there might be changes made to later weeks, so make sure to sync all changes from the main project before starting the lab.
- Clone your fork of the repository onto your local desktop.
- Work on the code locally as you complete the labs. Feel free to make commits to your fork as you work to keep track of your changes as you see fit. I recommend coming up with your own committing system to keep track of major changes, but this will not effect your completion of the assigment. Keep in mind that in some weeks, branches will be used to develop different version of the code for different steps of the tutorial. Make sure you switch to the right branch before starting the relevant tutorial.
- Once you have finished the week’s lab, submit a pull request back to the main project (data-mining-the-city), asking to merge all code. I will then review your code, and possibly make comments and ask for revisions within the pull request comments section.
To test out this workflow, let’s go through an example. On the data-mining-the-city Github site you will find a repo called getting-started.
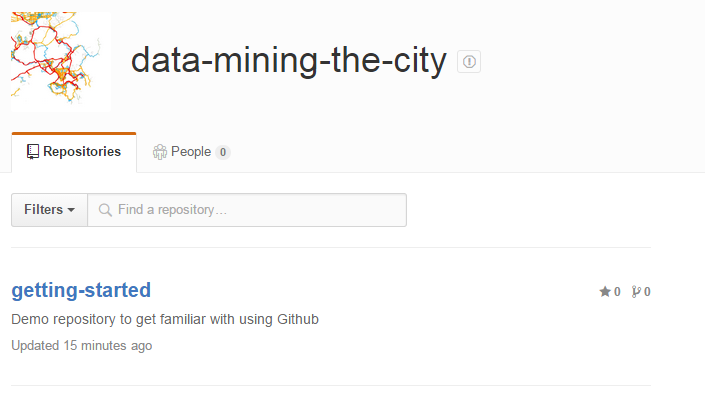
Click on this repository, which will take you to it’s page. At the top right corner of the page, click the button that says ‘Fork’.
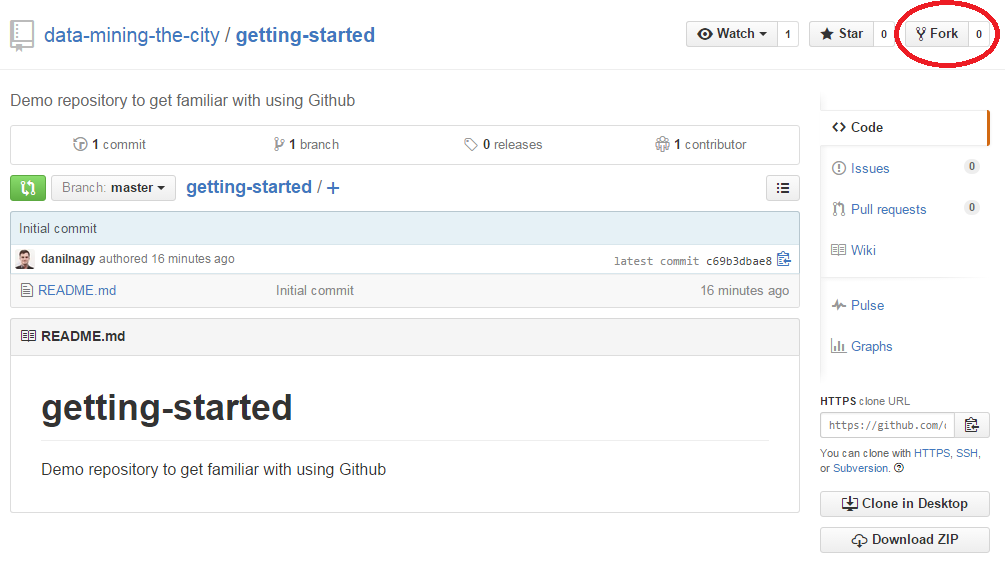
This will create a copy of the repository on your own Github account, to which you can commit changes. Now, let’s download and install the Github client, so you can clone the repository to your local computer and make changes to the files locally. Go here: https://desktop.github.com/ to download the client and follow the instructions to install it. I will use the windows version, but it works in a similar way for both Mac and Linux.
Once you have the client installed, you should see a blank interface. Click the plus sign in the upper left corner, and go to Clone. This should produce a list of any projects you have started or forked. CLick on your fork of ‘getting-started’, and click the check mark to clone this repository to your local computer. It will ask you where you want to clone the repository into. Select a folder such as ‘My Documents/GitHub’.
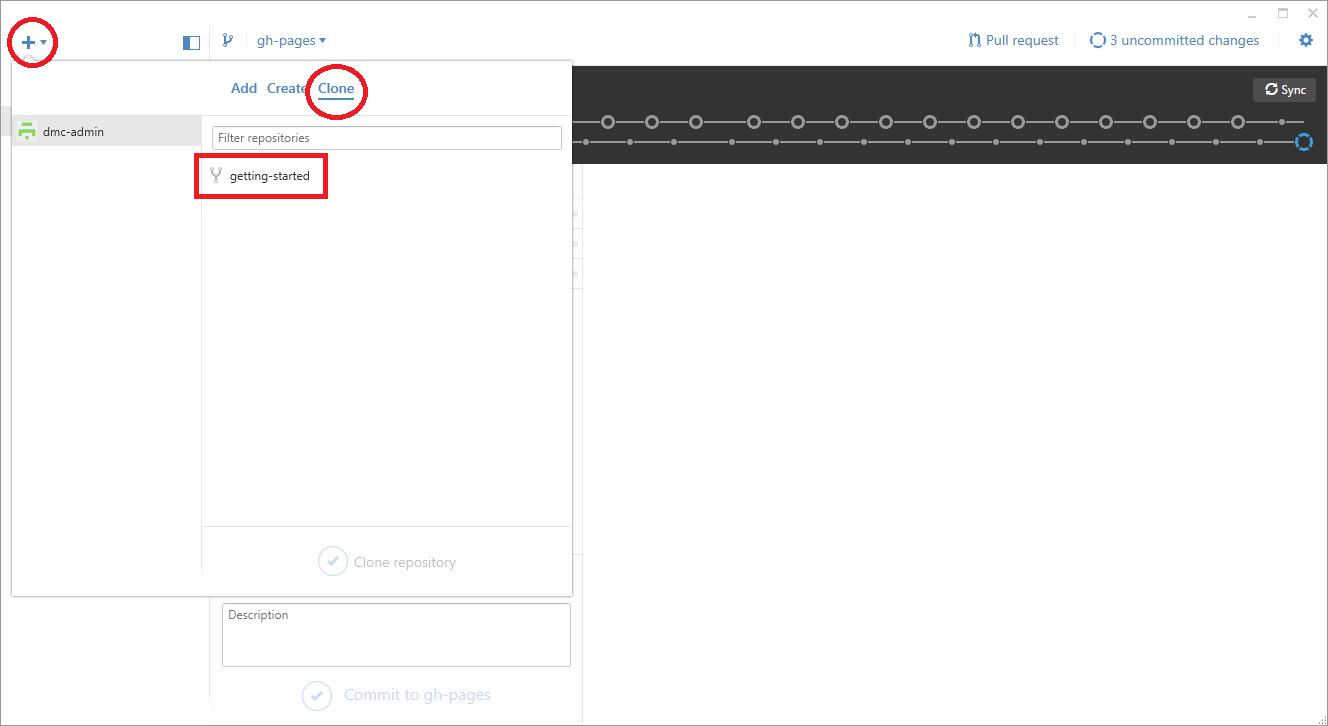
Once the process is complete, you will see a local copy of all the files from the repository in the specified folder and a blank interface telling you that you have not made any local changes.
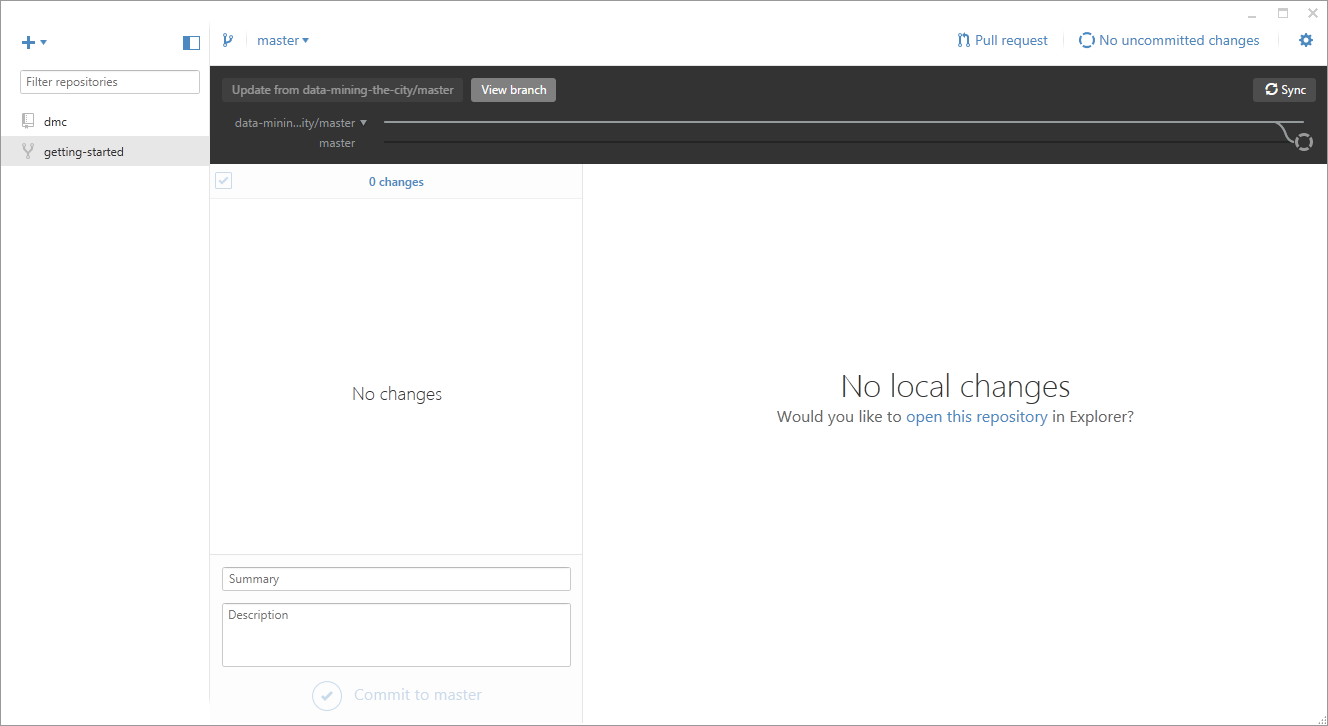
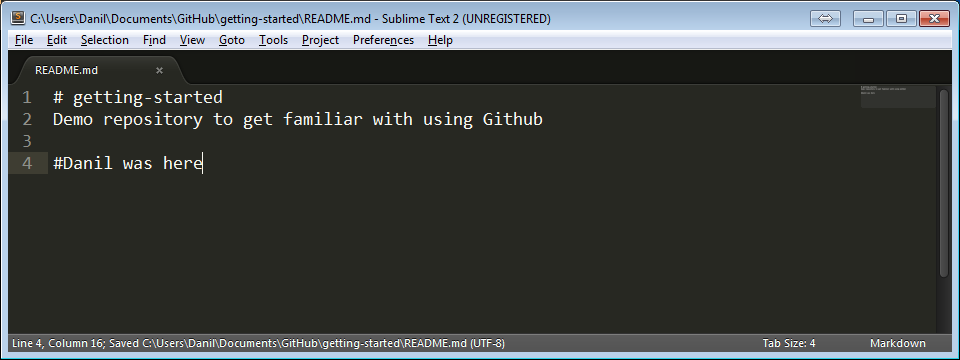
Go to the repo’s directory and find the README.md file in the main folder. Open the file in any text editor (I recommend downloading Sublime, which is a great free text editor with many useful features such as syntax highlighting). Make some change to the file and save it.
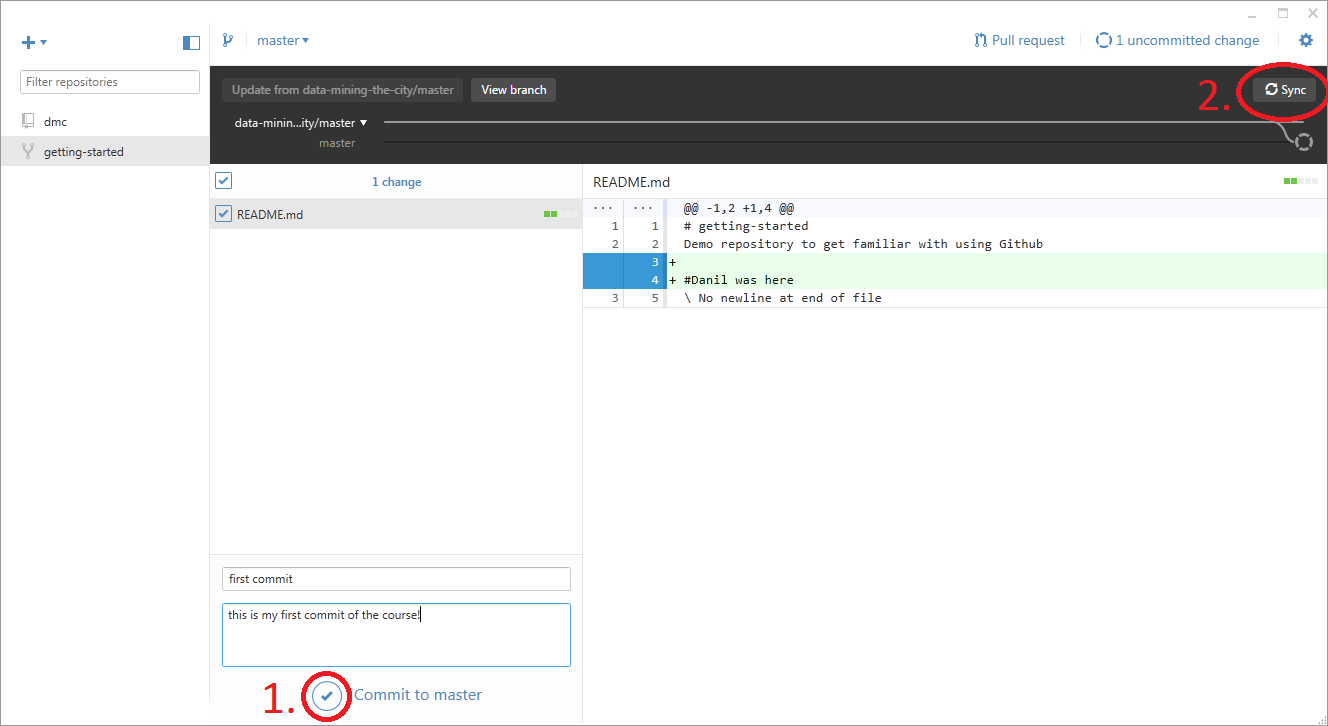
As soon as you hit save, Github will register the change, and will track it in the Github client. You can review the changes made to each file by clicking them on the left pane. It will then show you which lines were deleted (in red) and added (in green) since the last commmit. To commit these changes to the repository, type in a short description of the changes you made, and hit the checkmark next to ‘Commit to master’. To sync this commit to the online repository, hit the ‘Sync’ button in the top right corner. Anytime you want to make changes, make sure you both submit a commit AND sync to the server, or else no one else will be able to see your local changes.
Once the changes are synced, you can go back to the Github website and see that the changes are now reflected in your fork, with the commit description written next to the changed file.
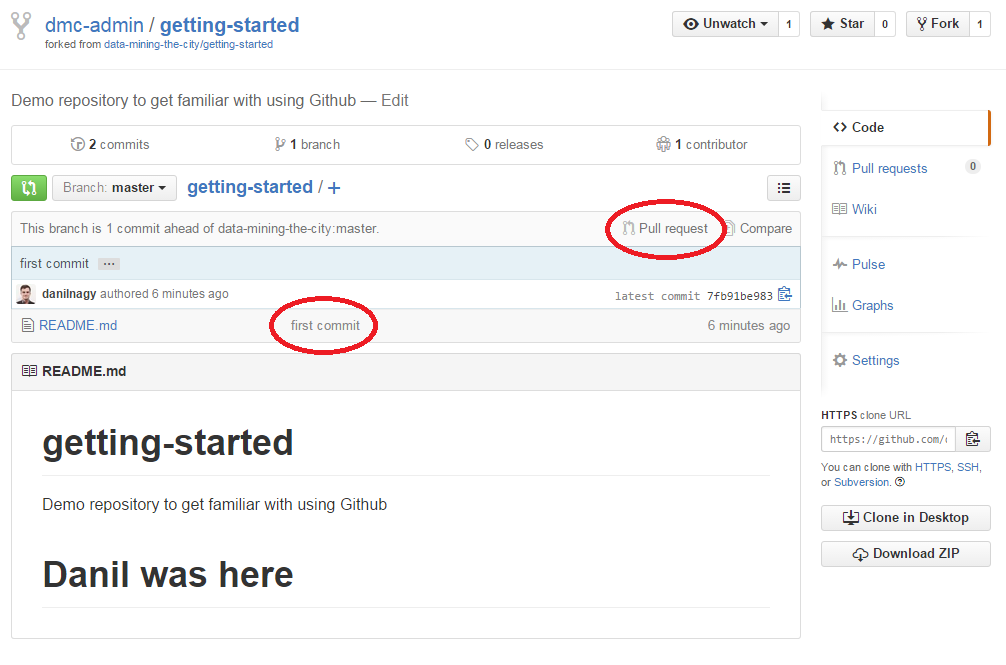
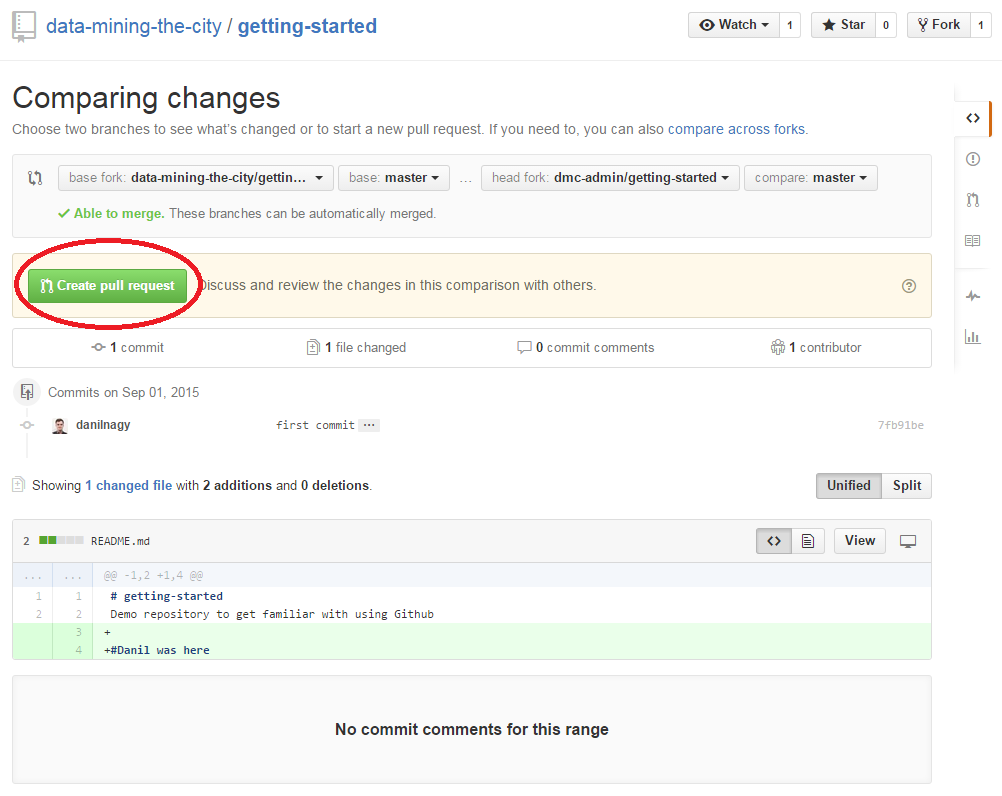
After you’ve made all the changes you want, you are now ready to submit your edits as a pull request to the master project. To start, click the text that says ‘Pull request’ (see image above). This will present you with an interface that lets you specify the source and target of the pull, as well as review the changes that have been made. On the top bar, the base fork should be the base project (data-mining-the-city/getting-started) and the head fork should be your fork (<user>/getting-started). In this case, since the changes are minor and are not in conflict with any changes made in the main project, it is able to merge the changes directly without any additional negotiations.
Once you are satisfied, hit the green ‘Create pull request’ button to submit the request. You will have to write a short message describing all the changes you have made since forking the project. Make sure to write down any information the main project owners might need to know while considering your request. This will be the same method you use to turn in your lab work each week, so make sure to also include any feedback, as well as describe any issues or difficulties you had.
After the pull request has been made, you will be notified by email about the status of the request, as well as any comments that are made in the comments section. I will use the pull requests to track and grade the assignments, and will use the comments section to leave you feedback and request any changes.